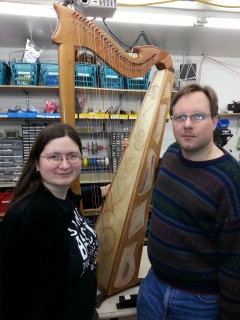
At long last, the CNC Steampunk Harp that Elizabeth and I have been building is, at least functionally, finished! In previous posts, I documented the process of routing pockets in the side of the harp using PS:One’s CNC router, and our road trip to Sector67 in Madison, WI to use their seriously awesome laser cutter. This completed the work on all wooden parts of the harp, and so I could finally assemble it.
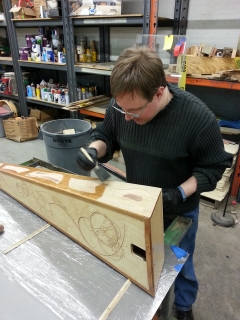
First, I had to glue the stiffener boards to the back of the sound board and used the drill press to make holes for the 33 strings. Gluing the sound board to the harp body required a lot of fast work: driving nails to hold the sound board in place, flipping it over and trying to wipe out the dripping glue while only having access to the inside via small holes, flipping it over to drive more nails, rinse, lather, repeat… all the while, the glue is starting to set. Then I glued the trim strips in place that covered all the nails. After that glue dried, I used a 1/4″ roundover bit on a router to clean up the sides of the sound box, and… oops! To my horror, I realized I forgot a step in the directions that said I was supposed to use extra nails to reinforce the area where the sound board joins the base near the pillar. Seeing as the harp has over 1000 lbs tension on the sound board and I really don’t want it pulling itself apart, I used the pneumatic nailer to shoot brads through the lower front trim strip. Then I needed to use wood putty to cover the brads. Oh, and did I mention that the angle of the nail gun wasn’t quite right and the brads poked through the bottom? So I had to bend them over with a nail set and cover those holes as well with wood putty. You live, you learn….
The devil is in the details, and this is no exception in harp construction. In some cases I’d clamped the trim strips unevenly and there were gaps that I had to fill with wood putty as well. This didn’t want to come off the plywood on the back of the harp after it dried, even with a sanding block. Jason saved the project by using his “scary sharp” chisels to shave it off, as well as cleaning up other areas like where the sound board joined the top of the harp. Then came a whole lot of sanding before I could start applying coats of finish. MusicMakers recommends wipe-on polyurethane. While I normally prefer more natural finishes like shellac or varnish, my primary goal is durability, and I’d had excellent results years ago using polyurethane on another harp I built. I used 4 coats in total, lightly sanding with 600 grit between coats.
When it came time to join the neck/pillar assembly that I had constructed and finished last year to the sound box, I discovered another problem. The trim strip on the sound box extended beyond the base, interfering with the fit of the pillar! So I called MusicMakers for advice, only to learn that this problem had been documented in a later version of the construction manual that they had already posted on their website. This required filing the trim by hand, but eventually I achieved a good fit.
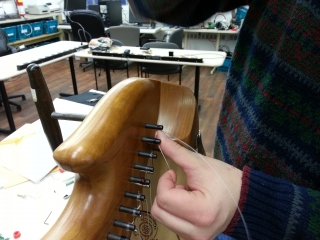
Stringing the harp was more challenging than I expected. The bass strings are wound steel, the treble strings are nylon, but the mid-range strings are gut. Yes, it is actual gut. No, it is not made out of dead cats; sheep are more likely candidates. The strings are made from wound strands of intestine covered in varnish. Unfortunately, this makes them quite rigid, which is exactly what I don’t want when I need to tie a knot in one end. It took a lot of bending in the appropriate area to break the varnish covering so I could knot it, with much difficulty.
Harps take forever to get in tune. Simply stringing it draws the sound board up, which shortens all the strings and makes them go flat. Tune the strings up in pitch again, and they all go flat again! Rinse, lather, repeat… dozens of times. Being organic, I wonder if the gut strings change as a result of humidity, and if they are more prone to stretching over time. So they are the usual suspects for going out of tune.
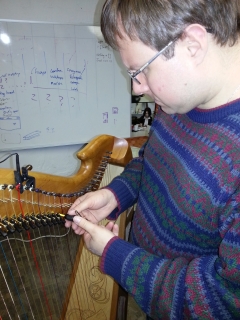
The last functional step is to install sharping levers. These allow the harp to play in multiple keys by raising certain notes up a half step. To play flats, one tunes the string flat by half a step. Engaging the lever makes the note a natural, and disengaging it makes it flat. I decided to undertake installing a lever on every string before realizing just how much work this entails. So I bought 33 Loveland sharping levers. These had to be installed by determining approximate placement using a paper template MusicMakers provided, marking the location of the screw hole, drilling it out, tapping it, and installing the lever. Then the real challenge of regulating the lever begins. This involves moving it up and down while plucking and listening to the string, meanwhile using a digital tuning meter to determine proper placement to produce an exact semitone difference in pitch. But to make matters worse, this is really a 3D problem. The lever may have to be disassembled to change the location of spacing washers to shift it right or left so that the string falls within the notch of the lever. And moving the string in and out by adjusting the bridge pins is necessary to set proper lever engagement, which changes the tone too. If the lever gets to the end of its range of motion and still isn’t right, well, then it’s time to drill and tap a new hole. Repeat 33 times for pure insanity.
Aesthetically, I’ve still got 10 brass panels that I’ve cut on the CNC router that still need galvanic etching with Elizabeth’s seriously awesome gear design. And I’m eventually considering addressable RGB LED lighting under the neck controlled by an Arduino. But… functionally, at least, the harp is done! It works! It sounds beautiful! Now I just have to remember how to play it….


