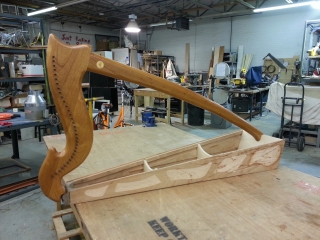
For the past year, Elizabeth and I have been collaborating on a project using the amazingly cool CNC tools at Pumping Station: One. The goal: to build a harp. Not just any harp, mind you. A steampunk harp! The idea was to start with a kit (the Voyageur harp from Music Makers, 33 strings, cherry) but heavily customize it as follows:
- CNC cut brass panel inserts, inlaid in pockets routed in the sides of the harp
- The brass panels would be etched using a galvanic etching process, similar to the one used by the Steampunk Workshop to create their clockwork guitar. Elizabeth would design the shape and custom artwork (gears, of course!) for this.
- The sound board would be laser engraved with some type of steampunk design. The design is in progress, and we are searching for a laser engraver large enough to handle the sound board.
- Although not strictly steampunk, I’d considered adding RGB addressable LED lighting under the neck of the harp, which could illuminate the strings, as well as respond to the pitch of the strings being played.
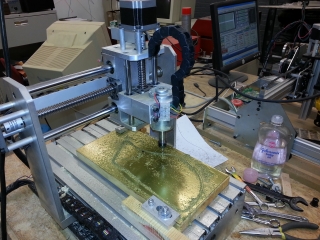
First, we had to start by routing the brass, using PS:One’s CNC 3020 router. Elizabeth drew the design, including the brass outline and the pattern we will use when we etch the brass. We did this last spring at PS:One, and we ran into massive problems with the brass vibrating and breaking end mills. The project remained dormant for many months until a breakthrough: What if we glued the brass to a scrap board? That would at least keep it immobile so it couldn’t chatter and bind on the end mill. The good news: This worked! Success! The bad news…. The Go To Home button on Mach3 does not, by default, raise the spindle before moving it. And a clamp was in the way. The result: A badly bent spindle. Well, all was not lost….
Bart mentioned that these Chinese spindles are readily available on eBay for all of $45. I purchased one, then waited for it to arrive from Hong Kong. When it did arrive, I was faced with another problem. The new motor was 52 mm in diameter. The old motor was 51 mm, and it would not fit! So I had a crazy idea. I disassembled the motor, and found that the case was about 3.4 mm in thickness. So shaving off a few tenths of a millimeter would make it fit, and it wouldn’t be enough to affect the motor’s structural integrity.
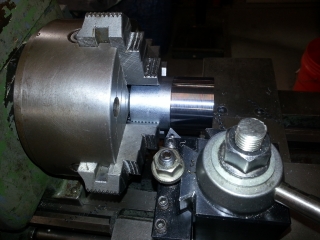
Fortunately, PS:One has an excellent Clausing metal lathe, and, seeing as this was my first lathe project after my initial certification, I got some help using it. It took a while to center the case in the 4 jaw chuck, but even though it was steel, it cut quite nicely. I trimmed off a little under 0.5 mm, test fit it in the mill, chucked the other end, and trimmed the other side. After doing all this work, the spring loaded commutators decided they didn’t want to stay put while I reassembled the motor. It took two people to get the motor back together again, but we were back in business!
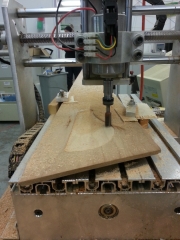
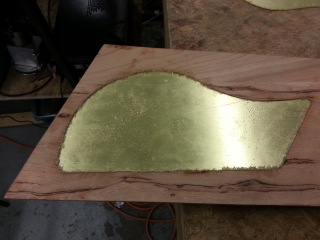
The next step: routing the wood. I used the same artwork Elizabeth created, and through trial and error learned that I needed to route the pockets 0.010″ larger, which provided a perfect fit with the brass. We used a 1/2″ router bit to remove the bulk of the wood, and took a second pass with a 1/8″ end mill to clean everything up. It took a while, but we successfully routed all ten pockets, five on each side. Once the sides were complete, I was then able to finish most of the construction on the harp body, except for the sound board, which still needs laser engraving before it could be assembled.
And here is a picture showing the brass panel (covered in plastic to prevent scratches) fitting perfectly inside the wood pocket.
Project status: So far, we’ve:
- Completely finished the neck and pillar of the harp, and installed all hardware
- Cut 2 of the 10 brass panels
- Did a proof of concept of galvanic etching on brass
- Routed all 10 pockets in the sides of the harp body
- Assembled the harp body, and glued on the back, and the trim strips.
